|
Yesterday was the Nashville Food Blogger bake sale Sweet Relief 3.0 to benefit the Houston Food Bank in the wake of Hurricane Harvey. Tailgate Brewery generously provided the space, and the turnout was great. We raised just over $1200 for the food bank! If you were able to make it out, I hope you enjoyed the treats that we were able to provide. Three of the items I donated have been posted on the blog previously; one is new. Follow the links below to get recipes and information about each. |
I shop, I cook, I learn, I eat, I try to keep up with the food scene in Nashville.
Showing posts with label desserts. Show all posts
Sunday, September 10, 2017
Sweet Relief 3.0 Bake Sale Wrap Up
Ginger Molasses Cookies
These Ginger Molasses Cookies have been in my repertoire for a long time, but it had been a while since I'd made them. I usually baked them to include in treat boxes that I used to make up for Christmas gifts. When I was considering what to make for the Nashville Food Blogger bake sale for Hurricane Harvey relief efforts, they seemed a perfect option. The warm spices and dark sweetness of the molasses are appropriate for the approach of autumn. Better yet, they are easy to make and package, both important considerations when baking for a sale.
Whenever I make these, I wonder why I don't make them more often, because they are more delicious than the recipe would make you think. The original recipe (I didn't make note of the source and have forgotten what it was) called them a Ginger Snap, but they do not snap. While they are a firm cookie with a slightly crisp edge, there's still a bit of softness that makes them a satisfying bite with a bit of chew.
Wednesday, December 24, 2014
Marjorie's Sugar Cookies - Christmas Cookies from Tupperware
This year I made our family Christmas cookie -- an unusual cutout sugar cookie -- for the first time in a long time. The recipe was a standby during my childhood and teen years, but I'd gotten out of the habit of making them. They are still, however, my favorite sugar cookie and are one of those tastes that says "Christmas" to me.
My mother spent a few years in the '70s as a Tupperware rep. She had two huge (and I mean huge) cardboard suitcases full of samples, and when she stopped repping, they were integrated into our kitchen. One other thing we had as a result of her Tupperware years was a cookbook. Naturally the recipes always featured using Tupperware products as equipment. Don't laugh -- Tupperware made (and makes) a LOT of products beyond storage bowls. We had Tupperware salt and pepper shakers, popsicle molds, and on and on.
But I digress. The cookbook had two sugar cookie recipes, and the one titled Marjorie's Sugar Cookies were an instant hit in our household. They became the go-to cookie for Christmas -- cut out, of course, with Tupperware cookie cutters. The Christmas shapes included a Christmas Tree, a Santa Claus, and a Candy Cane. Not only did Mama make the cookies for us to have at home, but often made many batches to provide to our classrooms and to the fire station where Daddy worked. I often helped with the production, and even made them on my own as I got older.
I'd gotten nostalgic for them and made a batch to share with friends and family. I'm very pleased to share them here.
My mother spent a few years in the '70s as a Tupperware rep. She had two huge (and I mean huge) cardboard suitcases full of samples, and when she stopped repping, they were integrated into our kitchen. One other thing we had as a result of her Tupperware years was a cookbook. Naturally the recipes always featured using Tupperware products as equipment. Don't laugh -- Tupperware made (and makes) a LOT of products beyond storage bowls. We had Tupperware salt and pepper shakers, popsicle molds, and on and on.
But I digress. The cookbook had two sugar cookie recipes, and the one titled Marjorie's Sugar Cookies were an instant hit in our household. They became the go-to cookie for Christmas -- cut out, of course, with Tupperware cookie cutters. The Christmas shapes included a Christmas Tree, a Santa Claus, and a Candy Cane. Not only did Mama make the cookies for us to have at home, but often made many batches to provide to our classrooms and to the fire station where Daddy worked. I often helped with the production, and even made them on my own as I got older.
I'd gotten nostalgic for them and made a batch to share with friends and family. I'm very pleased to share them here.
Monday, December 16, 2013
Homemade Marshmallows - Yes, Virginia, It's Candy
A few years ago, homemade marshmallows were all the rage on cooking bulletin boards I frequent. I gave it a try. They were OK but kind of chewy and underwhelming. I thought, "Well, I've done that now. Meh." Then my sister Kellie tried them last year, and discovered where my effort probably had fallen short (or long, actually). It's been a while, but with the cold weather and the increased consumption of hot cocoa, I thought I'd try again. The improved result is below. They aren't difficult, but there are two crucial things you have to get right.
In a way, marshmallows are cubes of super-whipped Jell-O. A sugar & corn syrup mixture is cooked to 240F, then beaten into softened unflavored gelatin. The mixture is whipped and whipped at high speed in a stand mixer, and fluffs up into clouds of sticky goodness. Given that the syrup is cooked to a specific temperature, marshmallows are, by definition, candy.
Sunday, November 10, 2013
Mini Chocolate Empanadas
It was a tough week. It started on Sunday with a difficult evening on the personal front, then it evolved into a long work week. (Because we can't let personal issues get in the way of work, can we?) I'm not a chocoholic, so I'm not a person who keeps bags of Hershey's Kisses around for emotional emergencies. Still, I'd been thinking for a while about experimenting with an idea I'd had for chocolate empanadas, and even I am not immune to the power of chocolate. So, it seemed as good a time as any to give it a go.
Sunday, July 28, 2013
Fudgesicles - Frozen Chocolate Treats for Summer
A couple of years ago, home made popsicles popped up on the foodie radar. The recipes I ran across were a far cry from the frozen Kool-Aid pops we made when I was a kid. Instead, a wide range of fruit, flavorings, and liquids were used to create frozen treats in all colors of the rainbow and with a variety of flavors and textures. The game was on in the SingleGrrl Kitchen.
Sunday, February 3, 2013
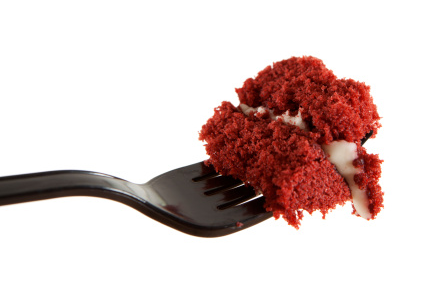
Straight to My Heart - Red Velvet Cake for Valentine's Day
Red Velvet Cake, Red Velvet Cupcakes, Red Velvet Ice Cream, Red Velvet Cookies, Red Velvet Waffles, Red Velvet ... Everything is all the rage, and has been for a few years now. Back in the day it was considered a regional dessert, common enough in the South but not well-known elsewhere. There's a bit of a joke there as the original Red Velvet Cake was developed at the Waldorf-Astoria Hotel in New York City. There is no definitive story about how it came to be popular in the South, but it was certainly a fixture at my grandmother Dorothy's Christmas table during my youth. In fact, it was such a hit with my brother Dale that to this day it's the cake he wants for his November birthday.
I'm not sure why RVC caught the imagination of the rest of the country a few years ago, but it's certainly entrenched now. I'm sure the current fad for Southern cuisine has helped keep it front and center. The problem, though, is that even when you are presented with an actual layer cake (as opposed to any other red velvet treat), it has often been bastardized. The "improved" version then often gets a reaction along the lines of "I don't understand why people make a fuss. It's just mediocre chocolate cake with a metric ton of artificial dye."
Well ... yes and no.
Monday, April 16, 2012
Ricotta Cookies and an Old Friend
When I was in college, I found an inexpensive Sunbeam hand mixer on clearance at Target. If memory serves, it cost something like $11. Not only did it have the standard beaters, but a whisk, a paddle, and a milkshake spindle. Until a little over a year ago, it was my only mixer. I wanted a stand mixer, but never felt I could justify spending the money a good one would cost. Being limited to a hand mixer didn't hold me back much -- I've made a metric ton of cookies and cakes and the like over the years, in addition to using the other attachments for a million other things. I've also made yeast breads, but always by hand -- kneading is a great stress-reliever, if a bit messy.
Then, last December I hurt my back and was essentially in bed for 2 weeks. I spent a lot of time web surfing on my netbook, and found myself on the KitchenAid Outlet web site. Between my upcoming birthday and my bedridden state, I was vulnerable to the terrific deal on the factory refurbished, all-metal gear, 6-qt bowl, 575-Watt, onyx black, "Professional" line thing of beauty I found. After all these years the hand mixer is still going strong, but I was ready -- more than ready -- for a grown-up mixer. I wanted to do some Serious Mixing when I got back on my feet.
It's great to have the KitchenAid, especially one so large & powerful. I made several batches of marshmallows, for example. Those require a motor with heft & stamina; the hand mixer would never have made it through. (Most regular stand mixers wouldn't make it through.) It's great for the stiff cookie doughs I'd never try with the hand mixer. Of course the dough hook makes yeast breads much easier, too. Still, when I want to make something simple, I find myself pulling out the little Sunbeam.
This weekend I made a batch of ricotta cookies from a recipe I've used for many years. In fact, I was only going to make half a batch, so I didn't need to fire up the KitchenAid. Old Sunny would do just fine.
The cookies were part of a dessert platter I had for Sunday after lunch with my friend Matt. They were accompanied by local organic strawberries from my CSA, Fresh Harvest, as well as cool white chocolate ganache and warm dark chocolate ganache. It was fun to try different combinations of fruit, cookie, and the two chocolates. The strawberries were nice and ripe but not terribly sweet, so having the chocolate to go with them was especially welcome.
The cookies themselves are a little unusual -- they are soft (but not gooey) and rise quite a bit, so that they are almost like sturdy little cakes. The flavor is subtle, rich with vanilla, and that makes them perfect to go with lots of things, from coffee to ice cream. They are also small, nice to have around when you want just a bite of something sweet. As you might guess from the featured ingredient, ricotta cookies are Italian in origin, and are often flavored with lemon juice and zest. I like them with lemon, but I thought the plan variety would be more suitable with the ganache. As is usual with basic baked goods, I also think they would be good with an addition of almond extract.
It's also a good recipe to have in your repertoire because they are drop cookies -- easy to mix, no refrigeration of the dough or rolling/cutting required. You also don't have to be terribly fussy about the way you mound the dough on the cookie sheet if you don't mind slightly irregular shapes. A cookie scoop helps form more evenly-sized, round cookies, but I just used two iced tea spoons.
1 teaspoon baking powder
1 teaspoon salt
1 cup (2 sticks) butter, softened
2 cups sugar
2 eggs
1 (15-ounce) container ricotta cheese*
1 tablespoon vanilla extract
Then, last December I hurt my back and was essentially in bed for 2 weeks. I spent a lot of time web surfing on my netbook, and found myself on the KitchenAid Outlet web site. Between my upcoming birthday and my bedridden state, I was vulnerable to the terrific deal on the factory refurbished, all-metal gear, 6-qt bowl, 575-Watt, onyx black, "Professional" line thing of beauty I found. After all these years the hand mixer is still going strong, but I was ready -- more than ready -- for a grown-up mixer. I wanted to do some Serious Mixing when I got back on my feet.
![]() |
| The New Guard watches the Old Guard make cookies |
This weekend I made a batch of ricotta cookies from a recipe I've used for many years. In fact, I was only going to make half a batch, so I didn't need to fire up the KitchenAid. Old Sunny would do just fine.
The cookies were part of a dessert platter I had for Sunday after lunch with my friend Matt. They were accompanied by local organic strawberries from my CSA, Fresh Harvest, as well as cool white chocolate ganache and warm dark chocolate ganache. It was fun to try different combinations of fruit, cookie, and the two chocolates. The strawberries were nice and ripe but not terribly sweet, so having the chocolate to go with them was especially welcome.
![]() |
| Photo by Matt, who also helped eat them |
The cookies themselves are a little unusual -- they are soft (but not gooey) and rise quite a bit, so that they are almost like sturdy little cakes. The flavor is subtle, rich with vanilla, and that makes them perfect to go with lots of things, from coffee to ice cream. They are also small, nice to have around when you want just a bite of something sweet. As you might guess from the featured ingredient, ricotta cookies are Italian in origin, and are often flavored with lemon juice and zest. I like them with lemon, but I thought the plan variety would be more suitable with the ganache. As is usual with basic baked goods, I also think they would be good with an addition of almond extract.
It's also a good recipe to have in your repertoire because they are drop cookies -- easy to mix, no refrigeration of the dough or rolling/cutting required. You also don't have to be terribly fussy about the way you mound the dough on the cookie sheet if you don't mind slightly irregular shapes. A cookie scoop helps form more evenly-sized, round cookies, but I just used two iced tea spoons.
![]() |
| Ready for the oven |
The recipe below is the full recipe; I frequently make only half. I also usually serve them as is, but you'll frequently find recipes where they are iced with a confectioner's sugar glaze. You could also sprinkle with coarse sugar before baking.
Ricotta Cookies
adapted from several sources
4 cups flour
1 teaspoon baking soda1 teaspoon baking powder
1 teaspoon salt
1 cup (2 sticks) butter, softened
2 cups sugar
2 eggs
1 (15-ounce) container ricotta cheese*
1 tablespoon vanilla extract
Sift together the flour, baking soda,
baking powder, and salt; set aside.
In a large mixing bowl cream together the butter and sugar until light and fluffy, scraping down the bowl with a
rubber spatula occasionally if necessary. Beat in the eggs, one at a time. Add the ricotta and vanilla and beat until well blended, scraping the sides of the bowl as necessary. With the mixer on medium low speed, gradually beat in the flour mixture until well combined, but do not overmix.
Using a small cookie scoop or a teaspoon, drop dough 2 inches apart onto cookie sheets (preferably lined with parchment paper). Bake until the cookies start to brown on the bottom, about 11 to 13 minutes (the tops will not brown). Remove from the oven and allow the cookies to
rest on the cookie sheet for 1 to 2 minutes before transferring them with a
spatula to wire racks to cool completely.
*I use whole milk ricotta
Variation: If you'd like the traditional lemon flavoring, add the zest and juice of one lemon with the ricotta and vanilla.
Labels:
baking,
cookies,
CSA,
desserts,
Italian,
local produce,
mixer,
seasonal,
strawberries
Tuesday, December 15, 2009
Let them eat 1-2-3-4 cake!
When I was a child, I often spent the night or even the weekend or a week with my grandmother -- "Celie Mama" for those of you who know my grandmothers from each other. She was not a grandmother who really loved cooking and baking and feeding people up, but we always had fun in the kitchen. One thing we made occasionally was a 1-2-3-4 Cake. I knew quite a bit about basic cake baking at a young age; my mother is a champ cake baker, and I was "helping" as soon as my precocious self could see over the edge of the counter. The 1-2-3-4 cake stuck in my mind, though, because the recipe was so easy: 1 cup of butter, 2 cups of sugar, 3 cups of self-rising flour, and 4 eggs (plus 1 cup of milk). It's a relative of the true, original pound cake (1 pound of butter, 1 pound of sugar ... etc.).So anyway ... I've always had a soft spot in my heart for 1-2-3-4 cake, but rarely made it on my own. A few years ago, though, I ran across a 1-2-3-4 Cake recipe in the paper. This one came from an Alice Waters cookbook (probably not actually written by Alice Waters, but, whatever). Not being a Southern recipe, it used cake flour and leavening instead of self-rising flour. What really caught my eye, though, was that it used one of my favorite cake tricks -- combining butter cake ingredients with a chiffon cake technique. With this recipe in particular, it transforms a not-quite-pound-cake into a lighter, more tender cake.
The wonder of this recipe is not only its simplicity but its flexibility. It is almost a master class in cakes because it is a dead-basic, classic cake, but there are an endless number of things you can do with it. First, it is in every way a traditional butter cake except for the whipped egg whites folded in at the end. You can vary the dairy product to get a slightly different flavor and texture. You can vary the flavorings and add embellishments like nuts. You can bake in any size/shape pan. You can serve it plain, in all it's vanilla-butter glory, or you can glaze or frost it. It is a recipe that is easy to divide in half; I have even made a quarter recipe.
Today I took small loaves of a personal variation to work today as holiday gifts, and was inspired to make this rare blog post, so great is my love for this recipe. So, without further ado, here it is. First, the recipe and variations that were published in the paper; second, today's variation, plus other variation ideas and notes.
Update: The Lime Coconut version of this cake I made for the Nashville Food Bloggers Sweet Relief 3.0 Bake Sale included these additions: 2/3 cup sweetened flake coconut, grated zest of 1 lime, and 1/2 tsp coconut flavoring. I added a glaze that had juice & zest of 1 lime, with enough confectioner's sugar to reach a good drizzling consistency.
1-2-3-4 Cake
adapted from The Art of Simple Food by Alice Waters
Makes 2 9-inch round cakes
1 cup unsalted butter (2 sticks), softened
2 cups sugar
3 cups sifted cake flour*
1/2 tsp salt
4 teaspoons baking powder
4 eggs, separated**
1 tsp vanilla extract
1 cup milk
- Preheat oven to 350F.
- Butter and flour 2 9-inch cake pans.***
- Sift together the flour, salt, and baking powder.
- In a large mixing bowl, beat butter until light and fluffy. Add sugar; cream together with butter.
- Beat in egg yolks, one at a time, then add vanilla.
- When well mixed, add the flour mixture and milk alternately, starting and ending with one third of the flour. Mix just until the flour is incorporated.
- In another bowl, whisk the egg whites to stiff peaks, but take care not to overbeat. Gently fold one third of the egg whites into the batter. Add the remaining egg whites and fold in; be careful not to over-mix.
- Pour batter into the prepared cake pans and bake until a toothpick inserted into the center comes out clean, 30 to 40 minutes.
- Let cake cool in pans 10 minutes. Invert cake onto plate, then immediately invert again on a wire rack. If using a glaze, it may be applied while the cake is warm. Otherwise, allow cake to cool completely before cutting or frosting.
- Lemon cake: Add 1 Tablespoon finely grated fresh lemon zest and 2 teaspoons fresh lemon juice to the batter.
- Orange cake: Add 1 Tablespoon finely grated fresh orange zest and 2 Tablespoons fresh orange juice to the batter.
**If you want a slightly denser cake, closer to a pound cake, do not separate the eggs; add the whole eggs in step 5 and skip step 7.
***You can, of course, use any type pan you like. The full recipe will fit into a full-size (10-inch) tube pan, or two 9x5 loaf pans, or four 8x4 loaf pans, for example. If using different pans, DO NOT adjust the oven temperature. You may, however, have to adjust cooking time; the tube pan may take 50-60 minutes. For more information on pan substitutions, see the excellent CraftyBaking.com reference page: https://www.craftybaking.com/howto/baking-pans-substitution-chart.
TL's Almond Cake
- The first change I made was to substitute buttermilk for the milk. You could also use sour cream or plain yogurt (preferably one without gelatin or other additives). These acidic dairy products not only give a subtle tangy flavor to the end product, but produce a more tender crumb. When you sub these acidic dairy products for regular milk, though, you have to add baking soda to counter the acidity. Otherwise, the leavening power of the other ingredients could be compromised. The rule of thumb is 1/2 tsp baking soda, added with the other dry ingredients, for every cup of buttermilk/sour cream/yogurt.
- The second change was to add 1 teaspoon of almond flavoring. In many cases, bakers will omit the vanilla when adding almond or other flavorings, but I like to use both. I could see reducing the vanilla to 1/2 teaspoon, but in this case I used a full teaspoon of each.
- To give a visual signal of the flavor of the cake, plus to provide a little embellishment to what was to be an un-iced cake, I added sliced almonds to the top of the batter right before putting the pans in the oven. It's a good idea to press them into the batter just a bit; otherwise, they'll fall off after baking.
I haven't tried any of these, but I think they would be *ahem* a piece of cake.
- Coconut Cake: Add a little coconut flavoring and top with sweetened shredded coconut before baking. (You could also mix the coconut into the batter.)
- Nut Cake: Top with any sort of chopped nuts before baking. I think chopped pecans would be great. Bonus points: Substitute Vanilla, Butter, & Nut flavoring for the vanilla extract.
- Berry Cake: Add fresh berries, either a single variety or a combination, along with a few teaspoons of finely grated lemon zest. (I would toss the berries with a couple of tablespoons of flour before adding to the batter.
- Spicy Cake: It might be fun to experiment with adding cardamom or ginger to this cake. Ginger and lime zest, maybe? mmmm
Saturday, March 28, 2009
Pie: Epic Fail
With the frequency of my blog entries being so shamefully low, it might appear that I'm obsessed about pie, given that this will be the second entry of the last three about pie. I'm not obsessed, but I have had another memorable pie-centered event.
You see, March 14 was Pi Day. Get it? Pi begins with the numbers 3.14, so, 3/14 every year is Pi Day. Congress even made it official this year. So, the natural way to celebrate Pi Day is to eat some pie. Not only are the two words homonyms, but pies have the added advantage of being circular. Ha.
Pi Day was on a Saturday this year, but since I have a new range that needed a workout, I thought I'd make a pie to take to work on Friday. Since I work in IT, I knew that my coworkers would be all over Pi Day and wouldn't look at me with that "you're a nerd, aren't you?" look I've gotten at other jobs.
I decided to make a basic chocolate cream, assuming that that would have the broadest appeal and wouldn't require too much work on a weeknight. (Despite the original intention to give the oven a workout, I wound up with a type of pie that wasn't baked, except for a brief stint for the crumb crust.) Not having a stand-by recipe, I perused my usual sources and narrowed it down to two candidates: A recipe from Gourmet, and one in Ruth Levy Beranbaum's The Pie and Pastry Bible.
For the filling, I chose Ruth's -- the two recipes were very similar, but Ruth's promised to be a little darker chocolate-wise, and called for whole eggs, which appealed to me more than the egg-yolk-only formula from Gourmet. If you are unfamiliar with Ruth's books, she's a food scientist at heart, and the recipes are calculated and tested to the nth degree, so I had no fear of making a recipe of hers to serve to others without a trial run. I did use the chocolate crumb crust from the Gourmet recipe since I wouldn't have time for the dough resting needed for a good pastry crust.
Naturally, my hubris got me.
The end result, while tasting fine, was not something I'd be proud to present. You see, both recipes call for mixing cornstarch with the egg/egg yolk at the beginning; milk is added later. This runs counter to every recipe and rule of thumb I know about cornstarch, which states you should always dissolve it in cold liquid before adding to the other ingredients. I trusted that Ruth (and Gourmet) new what they were doing, and that the cornstarch would dissolve and mix in well with the eggs.
It didn't.
Now, I freely admit that this could be as much user error as anything else; perhaps I didn't use a sufficient whisking technique. The fact remains, though, that the egg was just too viscous to readily absorb the cornstarch. I soldiered on, hoping the rest of the process, including the straining called for at the end, would redeem the mixture. To make a long story short, it didn't. The end result was the right consistency, and tasted good; it had a grainy texture rather than the dead-smooth texture you expect in a cream pie, though.
So, I did not take it to work -- it just wasn't up to my standards. I did enjoy a slice Friday night, just for testing purposes, mind you.
I will make another of these pies another day ... the difference is that I will be sure to mix the cornstarch with a little of the milk before mixing with the eggs!
You see, March 14 was Pi Day. Get it? Pi begins with the numbers 3.14, so, 3/14 every year is Pi Day. Congress even made it official this year. So, the natural way to celebrate Pi Day is to eat some pie. Not only are the two words homonyms, but pies have the added advantage of being circular. Ha.Pi Day was on a Saturday this year, but since I have a new range that needed a workout, I thought I'd make a pie to take to work on Friday. Since I work in IT, I knew that my coworkers would be all over Pi Day and wouldn't look at me with that "you're a nerd, aren't you?" look I've gotten at other jobs.
I decided to make a basic chocolate cream, assuming that that would have the broadest appeal and wouldn't require too much work on a weeknight. (Despite the original intention to give the oven a workout, I wound up with a type of pie that wasn't baked, except for a brief stint for the crumb crust.) Not having a stand-by recipe, I perused my usual sources and narrowed it down to two candidates: A recipe from Gourmet, and one in Ruth Levy Beranbaum's The Pie and Pastry Bible.For the filling, I chose Ruth's -- the two recipes were very similar, but Ruth's promised to be a little darker chocolate-wise, and called for whole eggs, which appealed to me more than the egg-yolk-only formula from Gourmet. If you are unfamiliar with Ruth's books, she's a food scientist at heart, and the recipes are calculated and tested to the nth degree, so I had no fear of making a recipe of hers to serve to others without a trial run. I did use the chocolate crumb crust from the Gourmet recipe since I wouldn't have time for the dough resting needed for a good pastry crust.
Naturally, my hubris got me.
The end result, while tasting fine, was not something I'd be proud to present. You see, both recipes call for mixing cornstarch with the egg/egg yolk at the beginning; milk is added later. This runs counter to every recipe and rule of thumb I know about cornstarch, which states you should always dissolve it in cold liquid before adding to the other ingredients. I trusted that Ruth (and Gourmet) new what they were doing, and that the cornstarch would dissolve and mix in well with the eggs.
It didn't.
Now, I freely admit that this could be as much user error as anything else; perhaps I didn't use a sufficient whisking technique. The fact remains, though, that the egg was just too viscous to readily absorb the cornstarch. I soldiered on, hoping the rest of the process, including the straining called for at the end, would redeem the mixture. To make a long story short, it didn't. The end result was the right consistency, and tasted good; it had a grainy texture rather than the dead-smooth texture you expect in a cream pie, though.
So, I did not take it to work -- it just wasn't up to my standards. I did enjoy a slice Friday night, just for testing purposes, mind you.
I will make another of these pies another day ... the difference is that I will be sure to mix the cornstarch with a little of the milk before mixing with the eggs!
Sunday, January 4, 2009
Baby don't you cry, gonna make a pie
If you've seen the film Waitress, you know that the title of this post is also the first two lines of a song the eponymous waitress sings as she ... makes the pies that she loves to make. Pie IS a glorious, fabulous thing, sometimes shunted aside in favor of its showier cousin Cake. A good pie is heaven-sent, though, and should never be taken for granted. I think we've gotten used to the excuse for pie we're often presented with: Frozen, commercially-prepared products that may satisfy a sweet tooth but which fail to live up to the wonder that is good pie.
I could spend an entire post on the home-made vs. store-bought crust issue; let's just say I've availed myself of both. When time and circumstances permit, though, home-made is definitely the way to go. Don't let Fear of Piecrust stand in your way, though -- if using that frozen pastry crust or packaged crumb crust gets you into the kitchen to make a pie, then by golly go right ahead. I won't look askance.
For the holidays recently I made four different pies (plus a cake). Thanksgiving was a mincemeat pie, because that is my mother's favorite for that holiday. The filling was packaged but the double crust was made from scratch. The other Thanksgiving pie was a two-layer pumpkin: A cheesecake-like layer topped by a fairly traditional pumpkin layer. The crust for that pie was also from scratch, using the same recipe as for the mincemeat. I'm told the mincemeat was good -- I didn't have any -- but I did love the pumpkin pie.
Pumpkin Cheesecake Pie - King Arthur Flour
The pie crust itself is a bit of a story. I didn't make the crust recipe that was part of the pumpkin pie recipe; instead, I made Rose Levy Beranbaum's recipe from The Pie and Pastry Bible. The recipe, while not more difficult than others, has more steps and takes more time. Still, I think the results are worth it and it's my standard recipe. I plan on making some others for the sake of comparison (for example, Cook's Illustrated's version that uses vodka instead of vinegar). The techniques and science behind Beranbaum's is sound, though, and no matter what recipe I use in the future I'll carry what I've learned from her with me.
Basic Flaky Pie Crust - Rose Levy Beranbaum
(NOTE: I use about half the amount of vinegar called for in the recipe, and sometimes omit the baking powder, esp. if I want the crust to hold a decorative shape.)
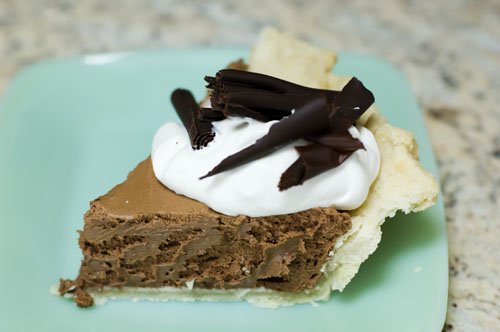
I made the second two pies for Christmas dinner. I was in the mood for some old-school, diner-type pies, and I thought these fit the bill. The first, a coconut cream, used Beranbaum's crust again. While my parents and I like coconut and are especially appreciative of a good coconut cream pie, my siblings are strongly anti-coconut. So, I knew that pie was going to have a limited audience. The second pie was destined to have broader appeal because it was chocolate -- a real old-fashioned French Silk pie.
French Silk has gone out of style -- indeed, it can be hard to find a recipe for it -- because it calls for raw eggs. We now have pasteurized raw eggs available, though. I have heard of people using Egg Beaters or the like as well, but I haven't tried that myself. A French Silk pie is beyond decadent, though, without being heavy like the leaden, almost bombastic death-by-chocolate sort of desserts that are so popular. Creamy and, well, silky, a French Silk is everything a pie should be.
Instead of a pastry crust, I used a crumb crust made with the Nabisco "Famous Chocolate Wafers." I also grated dark chocolate over the whipped cream rather than making the chocolate curls.
French Silk Chocolate Pie - Pioneer Woman blog
Coconut Cream Pie - Bon Appetit
I could spend an entire post on the home-made vs. store-bought crust issue; let's just say I've availed myself of both. When time and circumstances permit, though, home-made is definitely the way to go. Don't let Fear of Piecrust stand in your way, though -- if using that frozen pastry crust or packaged crumb crust gets you into the kitchen to make a pie, then by golly go right ahead. I won't look askance.
For the holidays recently I made four different pies (plus a cake). Thanksgiving was a mincemeat pie, because that is my mother's favorite for that holiday. The filling was packaged but the double crust was made from scratch. The other Thanksgiving pie was a two-layer pumpkin: A cheesecake-like layer topped by a fairly traditional pumpkin layer. The crust for that pie was also from scratch, using the same recipe as for the mincemeat. I'm told the mincemeat was good -- I didn't have any -- but I did love the pumpkin pie.
Pumpkin Cheesecake Pie - King Arthur Flour
The pie crust itself is a bit of a story. I didn't make the crust recipe that was part of the pumpkin pie recipe; instead, I made Rose Levy Beranbaum's recipe from The Pie and Pastry Bible. The recipe, while not more difficult than others, has more steps and takes more time. Still, I think the results are worth it and it's my standard recipe. I plan on making some others for the sake of comparison (for example, Cook's Illustrated's version that uses vodka instead of vinegar). The techniques and science behind Beranbaum's is sound, though, and no matter what recipe I use in the future I'll carry what I've learned from her with me.Basic Flaky Pie Crust - Rose Levy Beranbaum
(NOTE: I use about half the amount of vinegar called for in the recipe, and sometimes omit the baking powder, esp. if I want the crust to hold a decorative shape.)
I made the second two pies for Christmas dinner. I was in the mood for some old-school, diner-type pies, and I thought these fit the bill. The first, a coconut cream, used Beranbaum's crust again. While my parents and I like coconut and are especially appreciative of a good coconut cream pie, my siblings are strongly anti-coconut. So, I knew that pie was going to have a limited audience. The second pie was destined to have broader appeal because it was chocolate -- a real old-fashioned French Silk pie.
French Silk has gone out of style -- indeed, it can be hard to find a recipe for it -- because it calls for raw eggs. We now have pasteurized raw eggs available, though. I have heard of people using Egg Beaters or the like as well, but I haven't tried that myself. A French Silk pie is beyond decadent, though, without being heavy like the leaden, almost bombastic death-by-chocolate sort of desserts that are so popular. Creamy and, well, silky, a French Silk is everything a pie should be.Instead of a pastry crust, I used a crumb crust made with the Nabisco "Famous Chocolate Wafers." I also grated dark chocolate over the whipped cream rather than making the chocolate curls.
French Silk Chocolate Pie - Pioneer Woman blog
Coconut Cream Pie - Bon Appetit
Sunday, August 31, 2008
It's still ice cream weather
Last night I went out to dinner with some girlfriends for a birthday celebration, then we retreated to a member's house for make-your-own ice cream sundaes and a cupcake tasting. It was a very foodie day! I'll write another day about the restaurant and the cupcakes; today I wanted to post the recipes for the sauces I made for the sundaes.The first is hot fudge -- a recipe that mother has made as far back as I can remember. I modify it a bit by adding more chocolate. The second, a butterscotch sauce, is a recipe that's new to me; I wasn't absolutely thrilled with the final result, but it was fine and my fellow sundae-makers seemed to enjoy it. Today I discovered that I misread the recipe and did not use nearly as much cream as the recipe called for. I'm sure it'll be better next time when I actually follow the recipe. :P
Ferrell Hot Fudge
1 can sweetened condensed milk (preferably NOT low-fat)*
3 ounces unsweetened chocolate, broken into several pieces
1/3 cup water
pinch of salt
1/2 tsp vanilla extract
1 to 2 Tbsp butter, cut into small pieces
Add water to the bottom portion of a double boiler and bring to a boil. Lower the heat to medium. Combine condensed milk, chocolate, water, and salt in the top portion of a double boiler. Simmer, stirring occasionally, until chocolate is melted. Continue to stir until all ingredients are thoroughly blended and the sauce is smooth and of a completely uniform color. Remove from heat and stir in vanilla and butter. Stir until butter is completely incorporated. Serve hot or warm over ice cream.
* Sweetened condensed milk is an area where the brand matters to me -- I always use Borden's Eagle Brand.NOTES: If sauce is too thick, stir in additional water, a Tbsp at a time. Sauce can be refrigerated, covered, for several days. May be reheated in the double-boiler or the microwave -- heat gradually using medium heat and stirring frequently to avoid scorching.
---------------------------------------------
Butterscotch Sauce
Everyday Food
1 cup heavy cream
6 tablespoons butter
1/3 cup packed light-brown sugar
3 tablespoons light corn syrup
In a small saucepan, combine cream, butter, brown sugar, and corn syrup. Bring to a boil over high heat; cook, stirring occasionally, until sugar has dissolved, 2 to 3 minutes. Let cool to room temperature. Sauce can also be made up to 1 week ahead; cover and refrigerate in an airtight container.
TL's NOTES: This is a very thin sauce when hot. It is really best at room temperature. If you refrigerate it, bring to room temp before using.
Subscribe to:
Posts (Atom)